YouTube has over 30 million people watching 5 billion videos on a daily basis. With this kind of reach and engagement, it’s one of the best platforms for businesses to reach their target audiences through visual content.
You could use your YouTube business account to share tutorial videos on how to use your product or set it up. You could share short commercials to entice prospects or even behind-the-scenes videos to show transparency. Whatever you decide to do, you’re going to need to set up your YouTube business account first.
In addition to the initial account setup, proper optimisation of your channel is a great way to ensure that you draw in more viewers. If you’re completely new to it, you don’t have to worry because the process of creating a business YouTube account is fairly simple. This post will give you a step-by-step guide so you’ll know exactly what to do.
How to Create a YouTube Business Account: A Step-by-Step Guide:
5 Steps to Creating a YouTube Business Account
The process of creating a YouTube business account takes only five steps:
Step One: Create Your Google Account
While you can use an existing Google account, creating a new one specifically for your YouTube business channel is the best option if you’re sharing access with others. This way, you won’t have to deal with any security issues for your personal account.
Plus, it’ll be easier to keep everything organised since you’ll be able to sort all of your YouTube-related communication and notifications in one inbox. So you can separate it from other platform communication and notifications, making it easier to keep track of the latest updates.
You don’t necessarily have to use your business name when creating your Google account. However, it’s recommended that you include a business identifier in your username. This will make it easier to separate your business email from your personal email. You could add something like “XYZcompany” after your regular name.
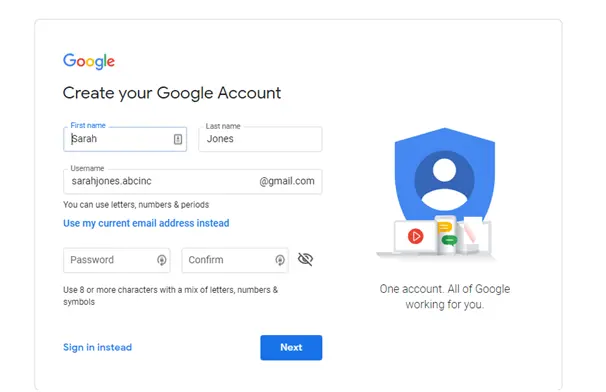
Image Source: Google Accounts
Step Two: Go to YouTube
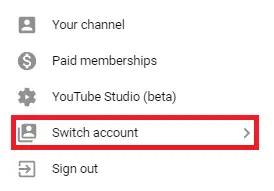
The next step is to go to the YouTube homepage and log in using your new Google account. If you’re already signed in using your personal account, click on the icon at the top right hand corner of the page. Go to “Switch account” and add your new Google account.
Step Three: Go to Your Channel
After this, you’ll need to start customising your channel for business since your goal is to create a YouTube business account. Click on your avatar icon at the top right hand corner of your screen and select “Your Channel.”
Step Four: Use YouTube as...
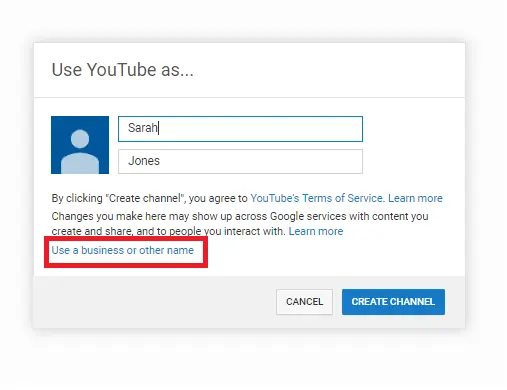
YouTube will then give you a prompt that auto-populates the fields with your first and last name. There, you’ll need to enter the username under which you want to use YouTube. If you’re building a business channel for your personal brand, you can stick with the auto-populated info.
Otherwise, you also have the option to use YouTube as a business or another name. Click on this option if you want to create a channel using your product or brand name.
Step Five: Create a Brand Account
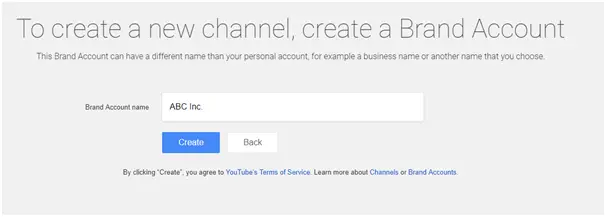
Once you click on the option mentioned earlier, you’ll be taken to a page prompting you to create a brand account. Enter your brand or business name, or the name under which you want to publish your brand videos and click on “Create.”
And that’s it. You’ve successfully created your YouTube business account. It’s very simple and straightforward so you should have no trouble setting it up.
Customising Your YouTube Business Account
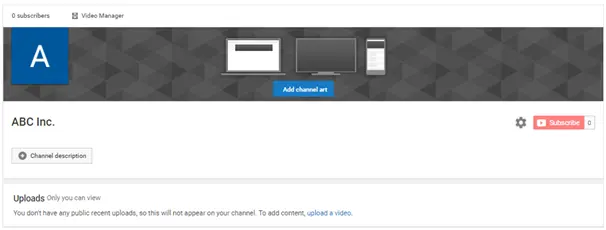
Once you’ve set up your YouTube business account, that’s not the end of your job. You still need to customise your account and make it more presentable. This process will not only help you attract your viewers’ attention but also help you gain visibility in search engine results.
First, click on the “Customise Channel” button to access all the channel customisation options.
On the next page, you’ll have the option to change various aspects of your channel including your channel art, icon, and description.
Channel Art and Icon
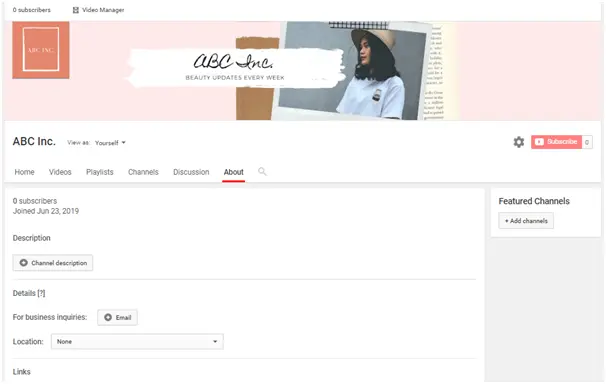
Just like you have a dedicated banner and icon for your other social media channels, you’ll need dedicated imagery for YouTube. You’ll need to have all of this ready before you start uploading videos so that you establish your brand credibility. You’ll typically use your brand logo and colours in your channel art and icon design.
When creating imagery for your YouTube channel, make sure you follow the platform guidelines:
- For Channel Art – According to YouTube, the ideal dimension for channel art is 2560 X 1440 px and the minimum dimension is 2048 X 1152 px. Maintain a safe area of at least 1546 X 423 px for text and logos. But don’t go over 2560 X 423 px if you want to make sure that everything is visible. In addition, your image file should be no larger than 6MB.
- For Channel Icon – YouTube recommends that you maintain 800 X 800 px dimensions. It should be a square or round image and should be able to render at 98 X 98 px. You can use JPG, BMP, GIF, or PNG files, but not animated GIFs. In addition, you cannot use any images that contain nudity, artwork, celebrities, or copyrighted images.
You can either have an in-house designer develop original graphics or create your own using free tools like Canva. Canva has some pre-designed templates using the recommended dimensions, so you can easily customise them to come up with a unique design.
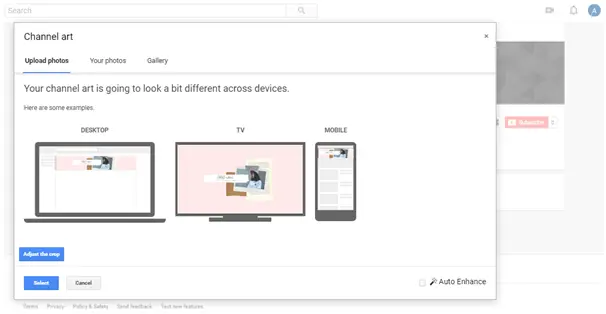
When uploading your channel art, YouTube will give you a preview of how it will look on different devices. You can make adjustments to get the optimal fit that looks great on every screen.
Channel Description
Once you have your original imagery up, your channel is going to look much more credible. But that’s not the end of your journey. You still need to take care of the “Channel Description” section, which is very easy to overlook.
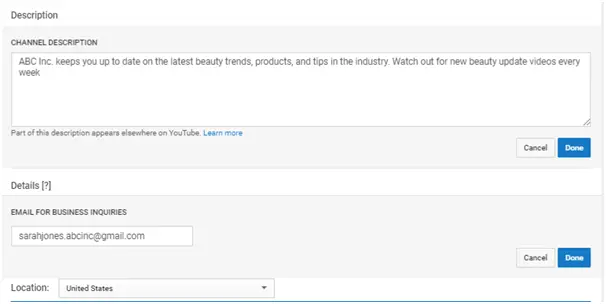
Under the “About” section, you’ll have the option to add your channel description and other important details about your business such as email address, location, and links. Your channel description doesn’t have to be extremely detailed, but it has to hit the mark.
Keep it brief but straight to the point. Talk about your business in 1-2 sentences and then explain your channel’s mission statement. You can also include calls-to-action encouraging people to subscribe to your channel or visit your website. What’s important, however, is that you include a few keywords or phrases naturally so that users can find your channel.
Finally, you can also add links to your homepage, social media profiles, and other pages where you’d like to direct your YouTube audience. This is a great way to get more traffic through YouTube and nurture your viewers so they can become real fans of your brand. You can add up to five links and create customisable hypertext links under 30 characters.
Once you’ve updated your links, this is how they’ll look on your channel.
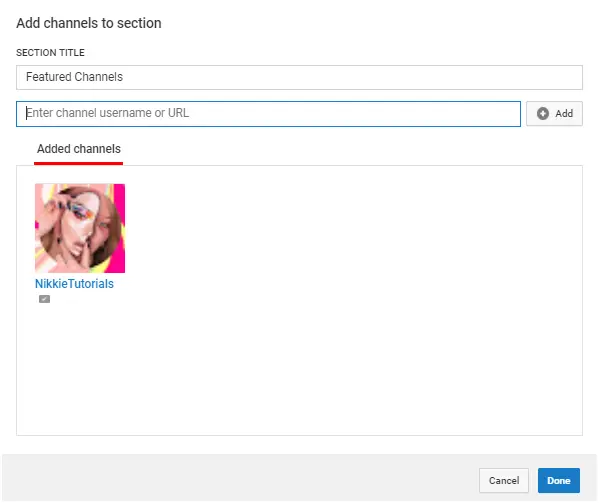
Featured Channels
Once you’ve updated your “About” section, you’re all set to start uploading videos on your channel. However, you can also make further customisations to improve your channel’s performance. One of those customisations would be your “Featured Channels” section.
Since YouTube is a community, just like any other social media channel, you need to actively participate by following other channels and liking their content. You can add some of your favourite non-competitor channels on your “Featured Channels” section to show them some love. This is a great way to show your audience that you’re actively involved in your industry.
Additional YouTube Optimisation Tips
Once you’ve nailed down the basics, you’ll have to start optimising your YouTube channel and videos to get more visibility and draw in more viewers.
Here are a few tips to help you get started:
- Use relevant keywords in your video titles and descriptions to increase visibility in search engines. This doesn’t just help you gain more visibility in YouTube search but also increases your chances of getting discovered through Google search.
- Create unique and relevant thumbnails for your videos to immediately capture the attention of your audience. The goal is to get them to click, so having an eye-catching thumbnail is an excellent way to accomplish this goal.
- Add relevant tags to your videos to increase their chances of showing up in relevant search results.
- Create video transcripts and captions so that YouTube can crawl your videos more easily. This will also enhance user experience, as it can help the hearing impaired understand your video content.
- Add a channel trailer to give a visual teaser of what your channel is all about. Keep it no longer than a minute to avoid losing people’s attention.
Final Thoughts
Now you have a clear idea of exactly what you need to do to create a YouTube business account. In addition, you even have a few ideas on how to optimise your channel to make sure that you reach your target audience. Make the most of this guide to set up your channel and promote your business effectively using videos.

