You can easily open up your Instagram account on a PC, by merely going to Instagram.com. You can see the posts in your queue, and the Stories at the top of your page. You can click on the Explore icon, do searches, follow people, and look at your profile page. You can even change quite a few of your Instagram settings. Annoyingly for PC users, however, you can’t easily make an Instagram post.
Instagram began as a totally mobile app, and still has a strong mobile emphasis. Any desktop capabilities are really an afterthought.
Yet desktop users need not give up altogether. There are quite a few ways that PC and Mac users can bypass the lack of native Instagram capabilities, making it possible to create posts from their computers. Here are a variety of tools and techniques you can use to post to Instagram from your desktop or laptop computer.
How to Post to Instagram from Your PC + 5 Tools:
Upload from Your Desktop Browser
Arguably the easiest way to upload photos and make posts to Instagram using your desktop browser is to "trick" your browser into thinking that you are using a mobile device. You can do this by changing the "user agent," which tells a browser what type of device you are using. Website developers often create different versions of their site for different devices, and browsers use a “user device” setting to know which version of the page they should upload. If you can artificially change the "user agent," you can show the mobile version of a site on your desktop browser.
Just be aware that changing your browser user agent won’t give you access to all of Instagram's features. You are looking at the mobile version of the Instagram website, and that lacks some of the features that you find in the official Instagram apps on your mobile device.
Some of the things you will have to do without when using your browser include adding filters to your photos, including multiple images in your posts, tagging someone within your picture, or editing captions after publishing. You also can’t make video or carousel posts.
Chrome
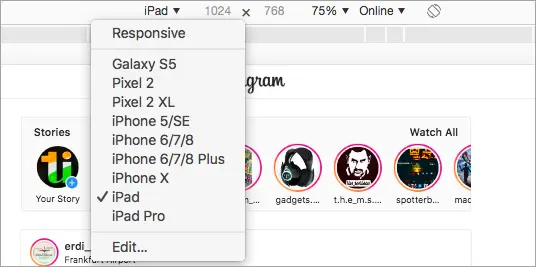
When using Chrome, you begin the process by going to Instagram.com as usual. This will initially give you the desktop view of the site. You can then right-click anywhere on the page and select Inspect from the resulting right-click menu. This will bring up the Inspector tool, that will cover up part of your page.
You will notice a couple of icons in the top left corner of the Inspector Tool. The second-from-left icon allows you to see the page in a mobile view. You will probably have to refresh your page at this point, but when it reloads, you should notice icons at the bottom of the mobile view of Instagram. This will include the symbol for making a new post (a square with a + inside it). Click on this icon, and you will be prompted for a photo to share. Continue to make your post.

Source: jihosoft.com

Source: jihosoft.com

Source: raphnelly.blogspot.com
You can continue using Chrome as usual, simply by clicking on the X in the top right of the Inspector tool window.
Safari
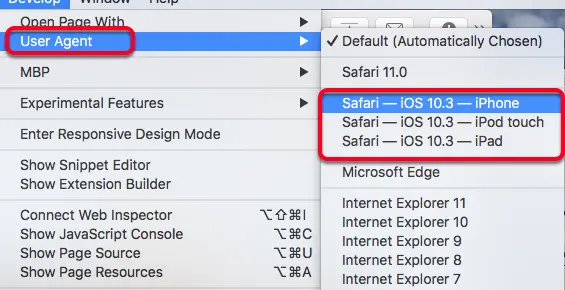
Using the Safari menu bar, go to Safari>Preferences>Advanced. At the bottom of the options on the Advanced tab, you will find a box marked Show Develop menu in menu bar. Check that.

Source: hbase.net
You can now open a new Safari window and find the Develop menu. Click on Develop>User Agent> and then a mention of an iOS version, e.g. Safari -- iOS 12.1.3 – iPhone.

Source: hbase.net
You can now go to Instagram.com and sign in to your account. It will now look more like the mobile version of Instagram, rather than the standard desktop version. You will find the same icons at the bottom of the screen that you see in the mobile version. Click on the image with a + inside a square. This will prompt you to select a photo to upload and begin the process of making an Instagram post.
You will need to remember to go back into your Preferences to change your user agent back to Default, so you can see websites in their desktop version again.
Use an Instagram Scheduling Tool
We have written extensively about scheduling posts in our reviews on social media marketing platforms. Instagram was one of the later social networks to be catered for by these platforms, mainly because Facebook/Instagram placed severe limitations on the use of their APIs as a fallout from the Cambridge Analytica scandal.
Gradually, many of these scheduling tools have added Instagram. Initially, most only provided limited scheduling capabilities, merely reminding you to do your actual posting manually (using a mobile device). However, Facebook/Instagram has investigated the requests from each of these platforms in turn for better API access, and most can now post for you – as long as you are using a Business or Creator Instagram profile. You still face severe limitations if you use a standard personal Instagram profile.
The following social media marketing tools now cater to Instagram, although their exact capabilities depend on the API access given to them by Facebook/Instagram.
- Later
- Buffer
- Loomly
- Promo Republic
- CoSchedule
- Sprout Social
- Sendible
- Agora Pulse
- Hootsuite
- Crowdfire

Source: coschedule.com
Use a Separate Tool
There is a range of apps that developers have created that help you to make posts to your Instagram account from a computer. You will usually have to download these apps to your computer to be able to use them.
Unfortunately, Instagram clearly discourages people from using these apps (apart from its own Creator Studio), and several of these apps have stopped working, currently on hold, awaiting a fix.
Bluestacks
Bluestacks acts as an Android emulator on your Mac or PC. It isn’t a perfect copy of Android, so you can’t run a full Instagram app. However, you can run a scaled-down version of Instagram. It sells itself mainly as a way to play your Android games on your PC.
You begin by downloading Bluestacks to your computer. You then upload your photos to Bluestacks’s Media Manager.

Source: izood.net
You can find a version of Instagram in their custom Google Play store. Use the search bar in the top right corner of Bluestacks, and once you have discovered Instagram, click Install. Once you have installed Instagram, you can open it within Bluestacks, looking very much like the official Android app.
You can use any photos you have uploaded to Bluestacks’ Media Manager, crop your pictures, add filters, and write captions. You can then upload these posts in a similar way to how you would do it on a genuine Android phone.

Source: izood.net
The Bluestacks version of Instagram does still have a few limitations, however. It doesn’t support video posts. However, you will find it more functional than posting to Instagram from your browser, using the hacks described above.
Deskgram

Source: deskgram.app/
As its name indicates, you can use Deskgram as a desktop version of Instagram. You can use it to upload high-quality photos directly from your browser. Unlike some of these apps, you run Deskgram from the web, so there is no need to install the software.
You can use Deskgram on Windows, Mac, and Linux machines. All you need is a copy of Google Chrome and the Deskgram Extension for Chrome.
Although Deskgram is great for creating image posts, video uploads are not currently possible in the Windows version.
Instagram Creator Studio
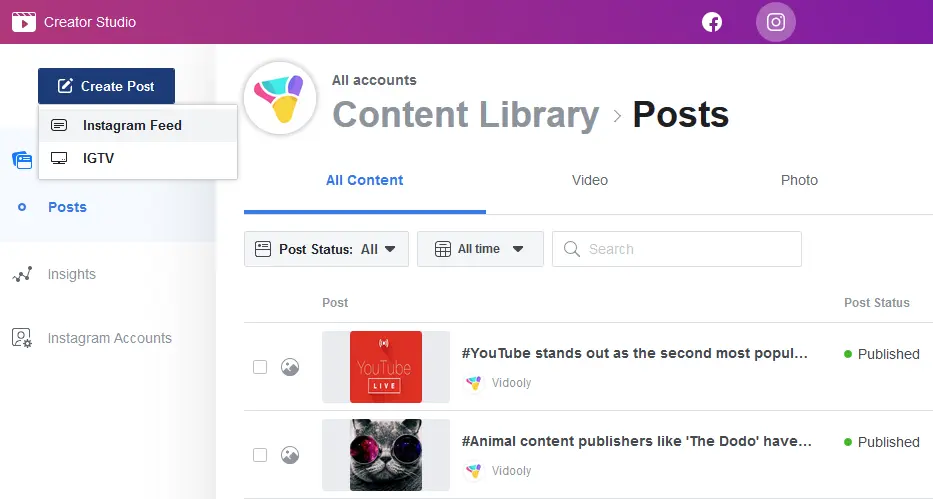
Instagram Creator Studio is arguably the most conventional way that you can upload photos to Instagram from a computer. You will need to have a Business or Creator account to be able to use it, however.

Source: elirose.com
Facebook introduced Creator Studio for its more serious users in 2017. This gave a simpler way for Facebook creators to manage their accounts. Users could edit videos and create more interesting posts.
The company expanded things to make an Instagram version of the Creator Studio available to influencers, businesses, and Instagram creators in late 2019.
Instagram Creator Studio offers many benefits, but importantly it allows creators to publish and schedule posts from your desktop. You can even schedule IGTV videos.

Source: vidooly.com
LR/Instagram
LR/Instagram is an option for people who use Adobe Lightroom. It is an unofficial publish plugin for Lightroom, allowing you to post photos directly to your Instagram account. You simply install the plugin, add new service in Lightroom Publishing Manager and authenticate with your Instagram account. You can then drag photos to the publish collection, then click Publish to upload your photos to Instagram immediately. It provides a metadata panel, where you can add hashtags to caption, to be published to Instagram.

Source: havecamerawilltravel.com
Unfortunately, LR/Instagram has recently been affected by the restrictions that Instagram now places on its API, and is currently not working correctly. It is awaiting a fix.
Uplet
If you have a Mac computer, you have the option of using Uplet, although because of login issues at the time of writing, it too has temporarily been removed from sale. Keep an eye on their site for details about when Uplet will be fixed and made available again.
When working correctly, the app lets you upload multiple high-resolution photos without compromising their original quality and add original captions from the convenience of your Mac keyboard. It is designed to power your photo and video sharing experience across Instagram.


