Social distancing might have put your social life on hold, but it has created the perfect environment for online courses to flourish. People from all across the world are turning to online courses to sharpen their skills and spend the time stuck at home more wisely. If you are thinking about creating an online course, there is a long list of different platforms available that will help you to create, sell and market your new course. So, you really do not have an excuse not to share your experience and knowledge with others. After all, you can create a pretty penny by selling online courses.
What Is an Online Course Platform?
In a nutshell, an online course platform is a type of learning management system (LMS) that gives creators all the tools they need to start selling online courses. From dedicated course platforms to WordPress plugins, there are many different options to go about teaching online.
Depending on the platform that you select, you will typically get access to features such as the ability to upload your content, edit the look of your course, create a website and send course completion certificates. Many of these platforms also include a set of marketing tools to help you spread the word about your new course.
Top Online Course Platforms
1. Thinkific
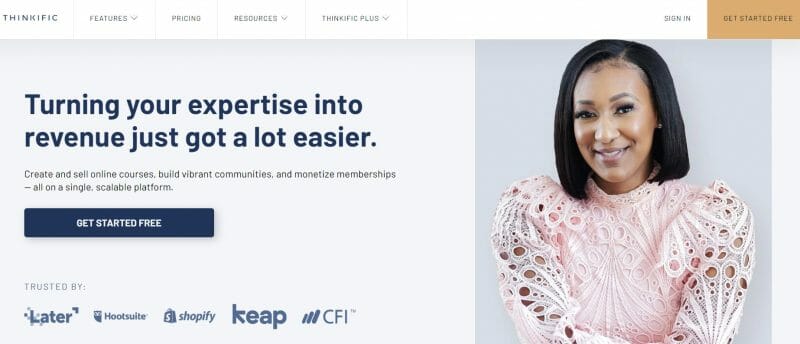
Thinkific is solely dedicated to helping creators create, sell, and market online courses. It is the best overall online course platform and the firm favorite of many. Trusted by more than 50,000 course creators, Thinkific has helped its users to generate more than $650 million since it was founded almost 10 years ago.
To get started, you will be prompted to complete a simple process which includes a detailed onboarding and introduction to all the different features. One of our favorite features is the ability to create categories. When you have created a minimum of two courses, you can create categories which help students to scan courses for classes about similar subject matter.
The focus of Thinkific is on making it as user-friendly as possible for creators. If you do not have an existing site that you want to connect, Thinkific offers a drag-and-drop builder which makes it easy to create your own courses and site.
Another major advantage of Thinkific is that unlike many other platforms, Thinkific actually offers a free basic plan. If you find the Free plan too limited (which you will probably do), its paid plans are also more affordable and the free trial period is longer than many alternatives. It includes three paid plans: Start ($74 per month), Grow ($149 per month), Expand ($374 per month).
Key features:
- Advanced reporting and tracking
- Drip content
- Quizzes and assignments
- A marketing sales suite
- A website builder
- Student engagement tools
- The ability to connect your custom domain
- Instant payout
2. Academy of Mine
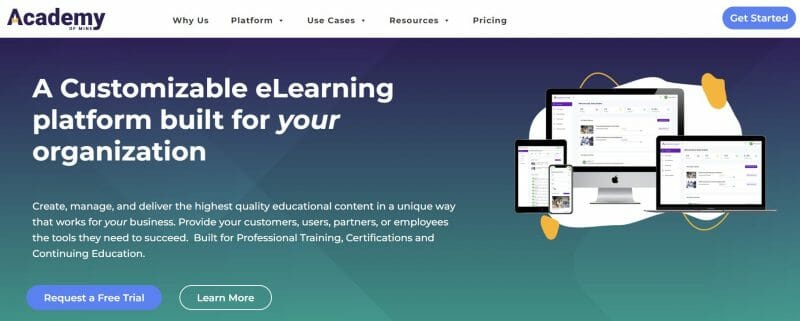
Trusted by the likes of HarperCollins, the University of Southern California and Allied Behavioral Health Services, Academy of Mine excels in round-the-clock personalized customer service and customization. One of its standard features that is included in all its plans is an e-learning platform that is custom built according to your specs.
All in all, it's very simple to get started. Upon signing up, you will receive a fully hosted while-labeled branded website. The only thing that you need to do is customize it according to your requirements.
Founded in 2014, it is better suited to small and medium-sized businesses as opposed to typical individual users as the long list of features will likely be excessive for solo entrepreneurs. It is also the most expensive option on our list. It offers three plans: Essentials ($599/ month), Professional ($999/ Month), Enterprise (Custom Pricing).
Key features:
- Quizzes and assignments
- Surveys and discussions
- A website builder
- Webinar integration
- Advanced reporting
- Custom payment gateways
3. LearnWorlds
With LearnWorlds, you can create, market, and sell courses online. Considering all the features on offer, it is more aimed at enterprise clients and training companies than individual users, even though it is more affordable and offers a generous free 30-day trial.
Overall, it is easy to find your way around its dashboard and create a course. If you should get stuck, there are different videos that you can watch. It also offers various ways in which you can engage your students in activities. For example, it gives you the ability to create interactive e-books by either uploading a Word document or converting your existing content.
With regards to customization, it gives you the option to add a logo and favicon. This way, you can make your course creator platform more your own. If you are familiar with coding, it also gives you the option to add custom code so that you can add unique elements to your site.
Key features:
- A site builder with 400 templates
- Login forms
- Marketing tools
- Drip content
- Quizzes, formal tests, and assignments
- Branded digital certificates
4. Podia
Founded in 2014, Podia is an online course platform that focuses on empowering content creators. It adapts a smart approach to creating courses which makes it easy and quick to get started. You can also use various formats that include online courses, bundles for a special price, digital downloads, and webinars.
One of the big appeals of using Podia is that it includes a pre-launch phase during which you can collect email addresses before your course goes live officially. This feature is especially beneficial if email marketing plays a big role in your digital marketing campaign.
A drawback, though, is that Podia does not include a built-in certificate feature. While this is not that big of a deal, it is still a nice-to-have feature. Also, its dashboard is not that user-friendly and creating a site is more difficult compared to other online course software.
Podia offers a free 14-day trial and three paid plans: Mover ($39 per month), Shaker ($89 per month), and Earthquaker ($199 per month).
Key features:
- A modern site builder
- Live previews
- Customizable branding
- Flexible layout
- Drip course content
- Instant payouts
5. Ruzuku
With Ruzuku, it is quick to create online courses. Launched a decade ago in 2011, it boasts integrations with Infusionsoft and MailChimp to help with email marketing and Stripe and PayPal to process payments.
One of the main bnefits of opting for Ruzuku is it does not charge transaction fees. While Ruzuku is not one of the most expensive platforms, there are cheaper options available. Its cheapest plan costs $99 per month. However, if you want to access polls, quizzes, subscriptions and payment plans, you will either have to sign up for the Core plan ($99 per month) or the Pro plan ($199 per month). If you consider Ruzuku, we recommend that you first take advantage of its free 14-day trial.
Key features:
- Drip content
- Live courses with automatic email notifications
- Daily backups
- Social profiles for students
- A professional video and audio hosting service
- Discussion forums
6. Teachable
While most of these platforms in our list are easy to use, Teachable is especially great for beginners as the platform is truly easy to understand and use. It was founded in 2013 and has since helped more than 100,000 creators to build, sell, and market their online courses.
Just like Thinkific, Teachable also allows you to link an existing website to Teachable via a custom domain or, alternatively, build a site. Though, unlike Thinkific, Teachable offers less flexibility and customization.
With regards to its pricing, it is pretty much in line with what similar platforms charge. The cheapest plan starts at $29 per month, while the most expensive plan will set you back $249 per month.
Key features:
- Unlimited courses
- Integrated payment processing
- Lecture comments
- Basic quizzes
- Student management
- Instant payouts
- Drip course
- Integrated email marketing
7. Kajabi

If the other six platforms have not given you that premier, professional feeling that you might be after, Kajabi is probably the most high-end platform of them all. It goes beyond the basic tools you will need to create, sell, and market online courses. Instead, it is an all-in-one platform that has all the tech you need to start an online business such as email marketing tools, eCommerce, and a CRM.
While you might expect to pay a fortune for all that it offers, its pricing is actually very reasonable. It offers three plans: Basic ($149 per month), Growth ($199 per month), and Pro ($399 per month). All these plans include a 30-day money-back guarantee and a 20% discount if you opt to pay annually instead.
Key features:
- The ability to use a custom domain
- Unlimited landing pages
- Ready-to-use templates
- Quizzes and surveys
8. Teachery
Created by course creators in 2014 for course creators, the team behind Teachery has an intimate knowledge of which features are the most important. For starters, it offers an unlimited for everything. In other words, you can create as many courses, landing pages, and payment pages for as many students as your heart desires.
One area where they do limit you, sadly, is regarding templates. Teachery offers only two customizable course templates: the minimal template and the sidebar template.
In terms of pricing, Teachery takes a slightly different approach. Instead of offering you a few plans, there is essentially only one plan. You can either opt to pay $49 per month or $470 per year.
Key features:
- A course affiliate marketing system
- The ability to embed video, audio, and slide presentations
- Email integration with ConvertKit and Mailchimp
- Integration with Zapier
- The ability to add a custom domain
- Analytics
9. iSpring
For two decades already, iSpring has been designing products for e-learning and online training. It offers a few products that you might be interested in depending on your needs. If you are interested in selling online courses, the product where you will start is iSpring market. Here, you can create a marketplace where you can sell your courses in a few simple steps. All you have to do is create an account, upload your content, add a short description, and decide on a price.
iSprings' pricing works a bit differently. The plans are based on the number of users. The cheapest plan accommodates up to 999 users and starts at $77 per month when billed annually. All plans come with a free 14-day trial.
Key features:
- Detailed statistics
- The ability to customize the domain
- Support for any format including videos, PDFs, and online courses
- Gamified learning
- Certificates
Wrapping Things Up
While pricing and features will play a deciding factor when selecting an online course platform, you also need to look at it from your future student’s point of view. What will the student experience be like for them?
Once you have decided on a platform, do not forget that even with the best online course platform, you cannot rest on your laurels. At the end of the day, the success of your course will greatly be determined by the quality of your content and your ability to market it.
Frequently Asked Questions
Is Thinkific better than Teachable?
When comparing Thinkific to Teachable, Thinkific offers more functionality and features designed to help you create courses quickly. Thinkific also offers more themes and layouts. Though, at the end of the day, deciding between Thinkific and Teachable really depends on your experience with building online courses as Teachable is considered by many as the easiest to use.
How does Kajabi compare to Thinkific?
Thinkific and Kajabi are both very powerful platforms. That being said, Kajabi offers more integrations, templates, and marketing tools than Thinkific. While both platforms offer student progress tracking, Kajabi includes powerful analytics and reporting. Kajabi also offers a complete email marketing platform directly through your admin dashboard.
Which is better: Teachable or LearnWorlds?
LearnWorlds is a more feature-rich platform than Teachable. For instance, it offers 400 site page templates. You also have four payment gateways to choose from, 200+ integrations, and telephonic, email and chat support, where Teachable offers only Stripe and Paypal to instructors and only email and chat support.
Should I use Podia or Kajabi?
Kajabi and Podia offer a collection of similar features. For example, both offer marketing and sales functionality in the form integrations, affiliate recruitment, and the option to bundle products. Though, Kajabi is more expensive. So, at the end of the day, whether Podia or Kajabi is the best online course platform will depend on your budget.
Is Podia a good alternative to Thinkific?
Yes! Podia and Thinkific offer very similar experiences and tools to help instructors build online courses.