
Augmented Reality (AR) filters on Instagram have revolutionized how brands and individuals engage with their audiences, offering interactive and immersive experiences that go beyond traditional content. AR technology, in general, is seeing a massive surge in marketing, with the technology poised to revolutionize shopping experiences.
AR filters on Instagram provide opportunities for brands to gain followers and the engagement they need to grow. One of the most popular uses for AR is for making cool Instagram stories, with others including stickers, polls, and swipe-up functionalities.
But what if we told you there's a way to make your own AR filters on Instagram? That's exactly what this article focuses on. So, let’s explore the exciting world of Instagram AR filters and unlock new potential for your marketing efforts.
But first, what are Instagram AR filters?
What Is An Instagram AR Filter?
Augmented reality (AR) filters are computer-generated effects designed to be superimposed on real-life images. AR filters work with your camera, adding a layer of imagery in the foreground or background of your image. There’s a good chance you’ve come into contact with an AR filter in one way or another on Instagram. For example, the Fresh AR Prince filter is a throwback to Will’s Smith iconic role as The Fresh Prince of Bel-air.
While Instagram AR filters were introduced back in 2017, it wasn’t possible for anyone to create their own AR filters until recently. Facebook released its in-house AR filter application called Meta Spark Studio, a tool that lets you build your very own Facebook and Instagram AR filters. What’s more, Meta Spark Player is also available on Google’s Play Store for Android devices and Apple’s App Store for iPhones.
The app gives users the chance to see what their AR filters will look like on a smartphone. The filter adds a hat to selfies or adds graffiti on the background if you flip your camera.
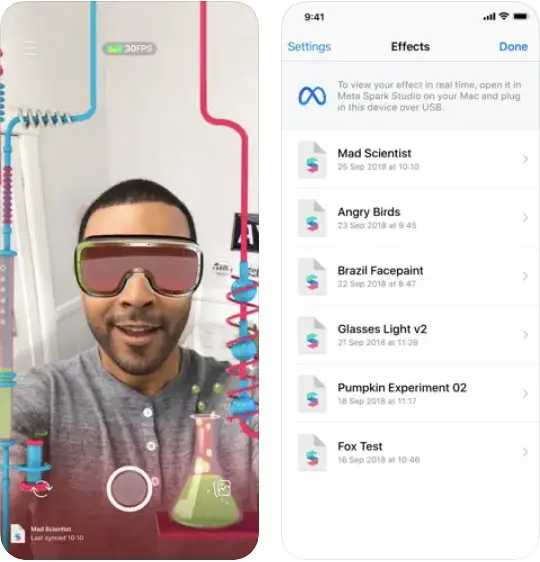
Source: apps.apple.com
Key Features of Instagram AR Filters
Key features of Instagram AR filters are:
- Interactive Elements: Users can interact with AR filters by moving their heads, blinking, tapping the screen, or other gestures. This interactivity makes the experience engaging and fun.
- 3D Objects and Animations: AR filters can incorporate 3D objects that appear as if they are part of the real-world environment. These objects can move, rotate, and respond to user interactions.
- Face Tracking and Recognition: Many AR filters use face tracking technology to apply effects that move and change with the user's facial expressions. This can include adding virtual makeup, hats, glasses, or other accessories.
- Customizable Effects: Brands and individuals can create custom AR filters that reflect their unique style and messaging. This customization allows for a personalized user experience that can strengthen brand identity and engagement.
- Real-Time Application: AR filters operate in real-time, allowing users to see the effects instantly as they capture photos or videos.
Benefits of Using Instagram AR Filters
Instagram AR filters offer a range of benefits that can significantly enhance your social media strategy. These filters are not only engaging and interactive but also powerful tools for increasing brand visibility and differentiation. Here’s a deeper look at the advantages of incorporating AR filters into your Instagram marketing efforts:
Enhanced Engagement
AR filters provide an immersive and interactive experience that captivates users. By allowing users to engage with your content in a playful and dynamic way, AR filters encourage longer interaction times and repeat usage. The novelty and fun of AR effects can also lead to increased shares and organic reach as users showcase their experiences to their followers. Additionally, AR filters often prompt users to create and share content, further enhancing engagement and visibility.
Increased Reach
When users interact with your AR filter, they often share their experiences on their own profiles, stories, and reels. This organic sharing amplifies your reach beyond your immediate follower base, exposing your brand to a wider audience. As users tag your account or use branded hashtags, your AR filter can quickly gain traction, leading to a viral spread that significantly boosts brand awareness.
Brand Differentiation
Custom AR filters allow you to showcase your brand's creativity and innovation, setting you apart from competitors. By designing unique and memorable filters that align with your brand identity, you can create a distinctive presence on Instagram. This differentiation helps in building a strong brand personality and fosters a deeper connection with your audience. Innovative AR filters demonstrate that your brand is forward-thinking and engaged with the latest digital trends.
For example, check out the official NBA Draft Pick AR filter.
User-Generated Content
One of the most powerful aspects of AR filters is their ability to generate user-generated content (UGC). When followers use and share your AR filters, they create authentic content that features your brand. This UGC serves as social proof, enhancing your brand's credibility and trustworthiness. Encouraging UGC not only increases engagement but also provides you with a wealth of content that can be repurposed for other marketing efforts, such as feature posts, stories, and ads. Here's a brilliant example.
Enhanced Brand Experience
AR filters can transform the way users perceive and interact with your brand. By offering an immersive experience, you can create memorable interactions that leave a lasting impression. Whether it’s through gamified filters, virtual try-ons, or interactive storytelling, AR filters can enhance the overall brand experience, making it more enjoyable and impactful.
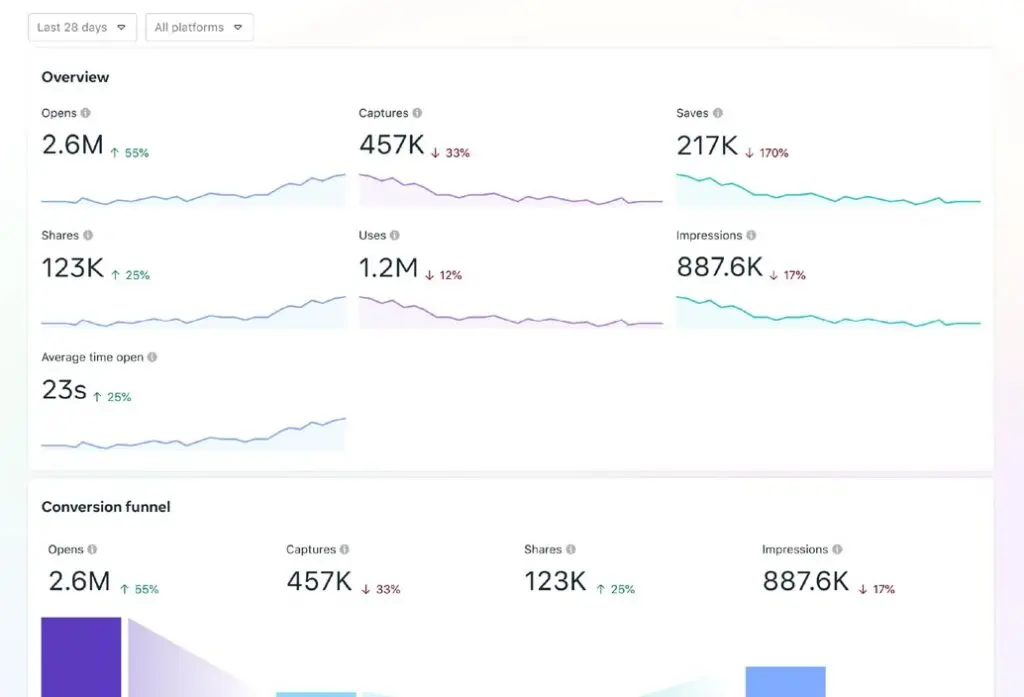
Data Insights and Analytics
Instagram provides insights and analytics for AR filters, allowing you to track their performance and understand user behavior. Metrics such as impressions, captures, and shares give you valuable data on how your audience is engaging with your filter. This information can help you refine your strategies, create more effective filters in the future, and better understand your audience's preferences.
This information is available through Meta Spark Studio. So you'll need to log in to your dashboard to see how your AR filters are performing.
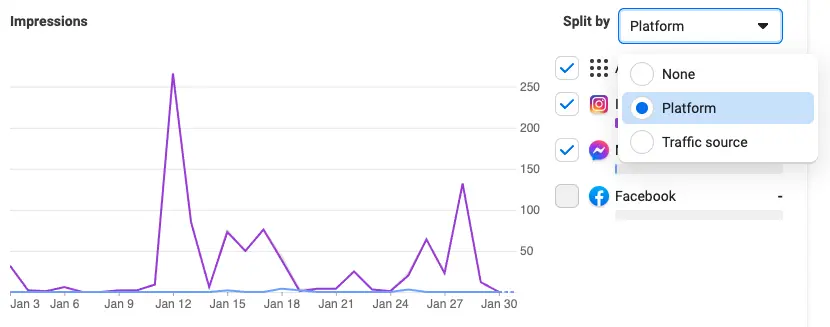
Source: Meta Spark Studio
Cost-Effective Marketing
Creating an AR filter is often more cost-effective than traditional advertising methods. Some AR and VR agencies will even develop these filters for as low as $1,000! Once developed, AR filters can provide ongoing value without the need for continuous investment. The initial cost of creating a high-quality AR filter is outweighed by the long-term engagement and visibility it can generate.
Instagram AR filters offer several key benefits that can enhance your social media strategy and brand engagement:
- Enhanced Engagement: AR filters provide an interactive and enjoyable experience, encouraging users to spend more time on your content and share it with their followers.
- Increased Reach: When users share their experiences with your AR filter, it can quickly spread to a wider audience, increasing your brand's visibility.
- Brand Differentiation: Custom AR filters can set your brand apart from competitors by showcasing creativity and innovation.
- User-Generated Content: Encouraging followers to use and share your AR filters can generate a wealth of user-generated content, which can be leveraged for further marketing efforts.
- Enhanced Brand Experience: AR filters offer immersive interactions that create memorable brand experiences for users.
- Data Insights and Analytics: Instagram provides metrics to track the performance of your AR filters, offering valuable insights into user behavior.
- Cost-Effective Marketing: Creating an AR filter is often more cost-effective than traditional advertising methods, providing long-term value with minimal ongoing investment.
What Is In Meta Spark Studio?
Meta Spark Studio makes it possible to customize images and videos for both Facebook and Instagram. While creating your own AR filters sounds like a complex undertaking, Meta Spark Studio was built to make the process easy. It also comes with a host of features. Let's explore the capabilities it provides:
Versatile And Expandable AR platform
Meta Spark Studio caters to both beginners and advanced developers. Users can start with pre-designed templates and a visual patch editor, requiring no coding skills. For those with programming knowledge, the platform supports JavaScript for deeper customization, allowing the development of unique and innovative AR effects.
Key Features
- Templates and Patch Editor: Utilize pre-made templates and a visual patch editor to quickly create sophisticated AR effects.
- JavaScript Integration: Advanced users can employ JavaScript for custom logic and interactions, pushing creative boundaries.
- Extensive Asset Library: Access a rich library of 3D objects, textures, and sounds to enhance AR filters.
Robust And Immersive Features

Source: spark.meta.com
Meta Spark Studio supports the creation of highly interactive and immersive AR experiences through a range of powerful tools:
- Target Tracking and Depth Mapping: Enable AR effects to interact with real-world objects and environments, providing realistic placement and occlusion.
- Occlusion: Enhance the illusion of depth by allowing virtual objects to appear behind real-world items.
- Audio and Haptic Integrations: Add sound effects and tactile feedback to create multi-sensory AR experiences.
- Face and Body Tracking: Apply effects that respond to user facial expressions and body movements for personalized interactions.
Publish And Monitor Performance
Source: spark.meta.com
Meta Spark Studio provides comprehensive tools for publishing and tracking the performance of AR filters across Meta's platforms:
- Meta Spark Hub: Manage all AR effects from a single dashboard, where you can upload, publish, and monitor them.
- Performance Tracking: Gain insights into user interactions with your AR filters by tracking metrics such as impressions, captures, and shares.
- Distribution: Share links to AR experiences or publish them directly to Facebook and Instagram, reaching millions of users worldwide.
Meta Spark Studio democratizes AR creation, offering powerful tools and features for both novices and experienced developers to bring their creative visions to life.
How to Create Your Own Instagram AR Filter
Creating your very first Instagram AR filter will mean learning a few new ideas and terminology, but nothing you can’t grasp. Here’s a step-by-step guide on how to get started creating yours.
Step 1: Download Meta Spark Studio
Meta Spark Studio is a desktop application and comes in at 464 MB in size. While relatively small, it’s a powerful tool that you’ll find very easy to use the more you work with it. It is currently only available for Mac and Windows users with no mention if Linux users will see a version of the app.
If you are a Linux user, consider using Wine, a popular compatibility layer designed to allow Linux users to install and enjoy Windows applications. While we haven’t tested Wine and Meta Spark Studio, give it a try, it may work.
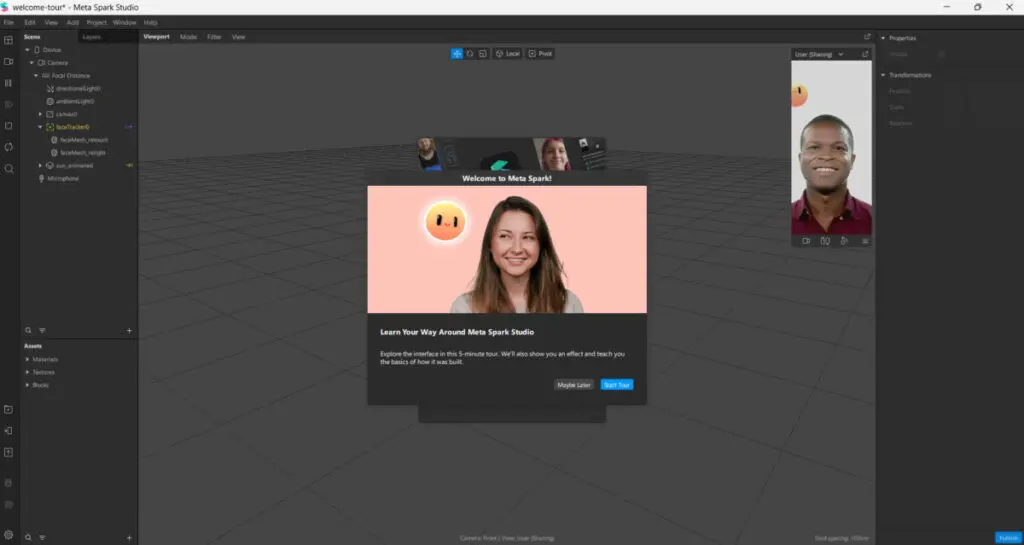
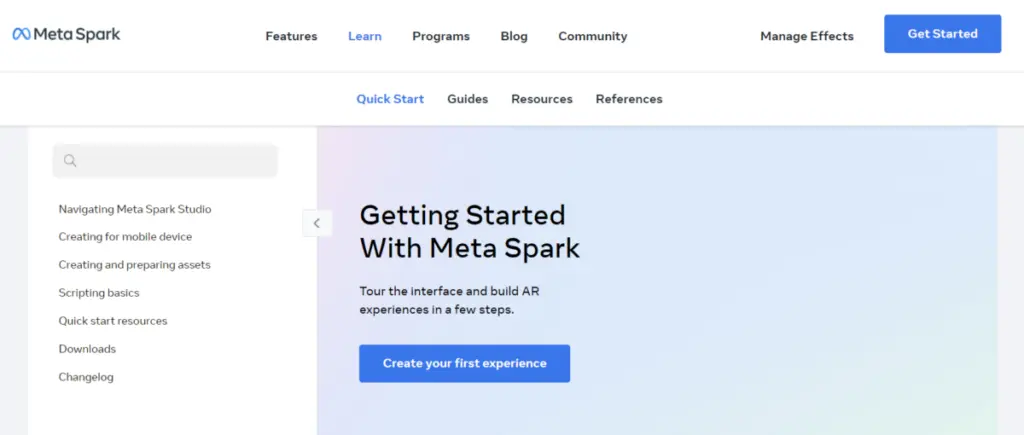
Step 2: Get Familiar With the Platform
Once installed, we recommend that you take some time to cover a few tutorials to get familiar with the platform. Meta Spark Studio comes with a helpful welcome tour. It lasts five minutes and will help you get familiar with most aspects of the platform.
If you need more guidance, head to the learning center where you’ll find a collection of tutorials. The Getting Started Section includes basics that will help you quickly come up to speed with features and how to navigate Meta Spark Studio. It also includes tutorials on creating a face tracking effect, previewing Meta Spark Studio effects, using the face reference assets, using templates, features and processes, effect lifecycle, policy, and more.
Source: spark.meta.com
Step 3: Adding Your Object
Next, pick the type of AR filter you’d like to create. In our example, we’re going to create a world object. This option allows us to place a 3D object in a real-world setting.
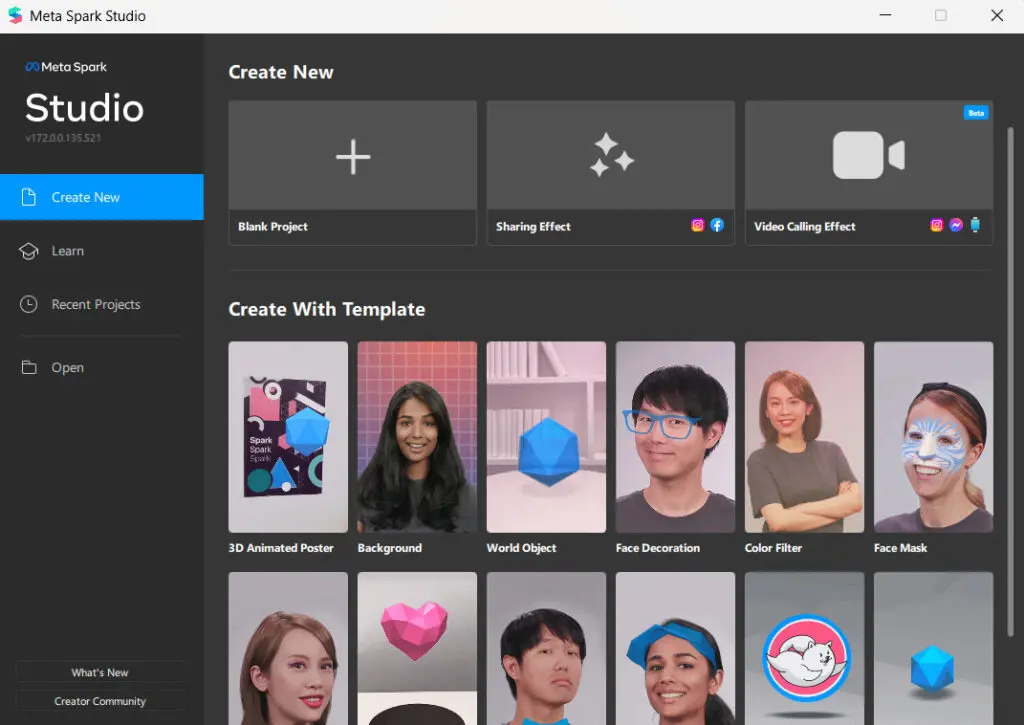
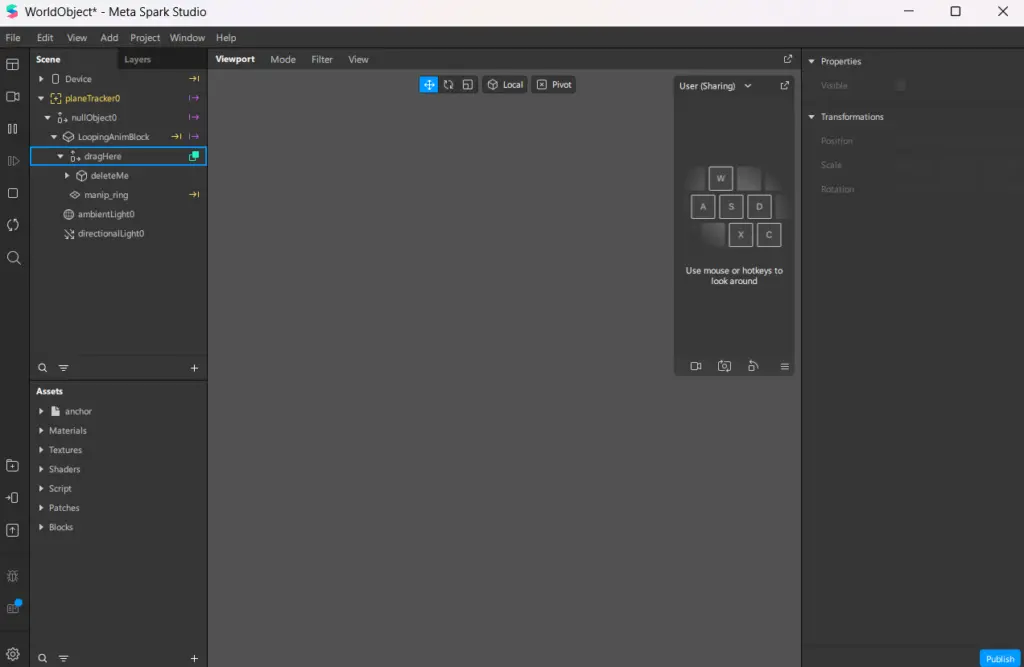
To get started, click on the project of your choice and you’ll be transported to a canvas, also called the Viewport, with your object placeholder preloaded.
Note: if this is your first time using Meta Spark Studio, you will need to accept their policy agreement before gaining access to your canvas.
The Viewport may look like a complex canvas, but remember to use the tutorials section for guidance on using each feature if you get stuck. When in the Viewport, you’ll need to add an object. You can import one or access Meta Spark Studio’s growing library of objects.
We’re going to use the AR Library to import an object. To follow along, click on File in the main menu (top left of the application), then click on Import from AR Library.
A new window will open with various options. Select 3D Objects from the left-hand menu.
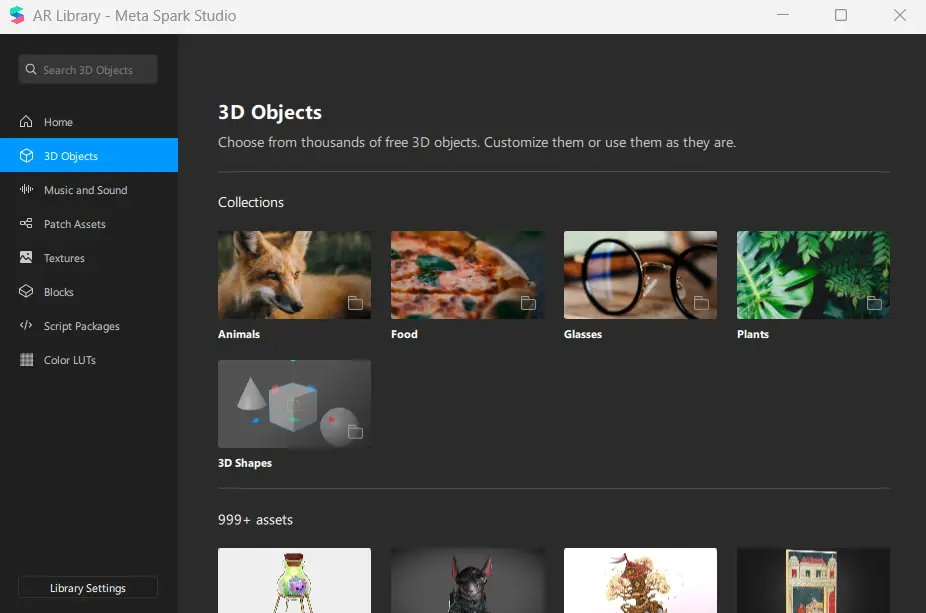
Once you’ve found your object, click on the Import Free button.
As Facebook uses Sketchfab’s library of assets, you’ll need to create a Sketchfab account or log into their site using your Facebook, Google, or Twitter account.
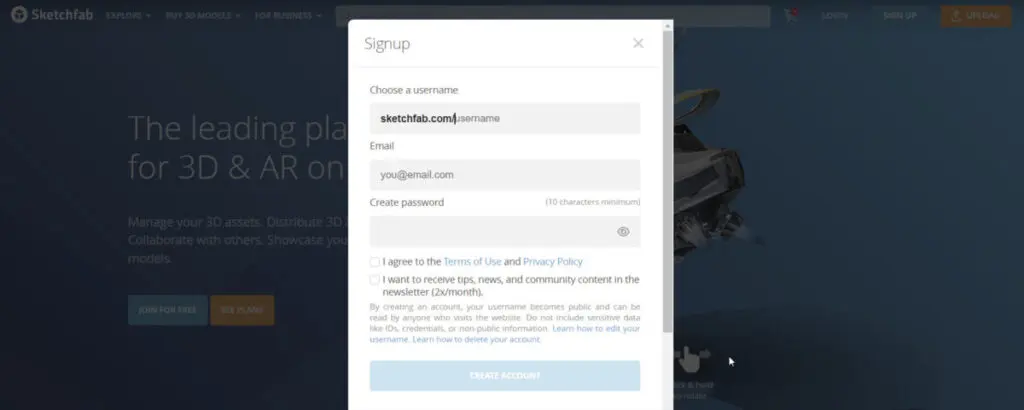
Source: sketchfab.com
Adding Sound
While in the AR Library, you have the option to add sound to your AR filters and can import clips directly from the library.
Step 4: Add Effects
With your object in the Viewport, it’s time to add effects. These will relate to how your object reacts to user manipulation.
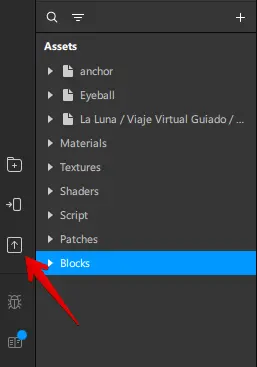
Effects include how your object will move and how it will look when positioned at different angles in the real world. For our object, we’re going to use a rendering of the moon. To animate our object, we’ll drag and drop it from the Assets panel into the Scene panel, just below the “drag here” menu item.
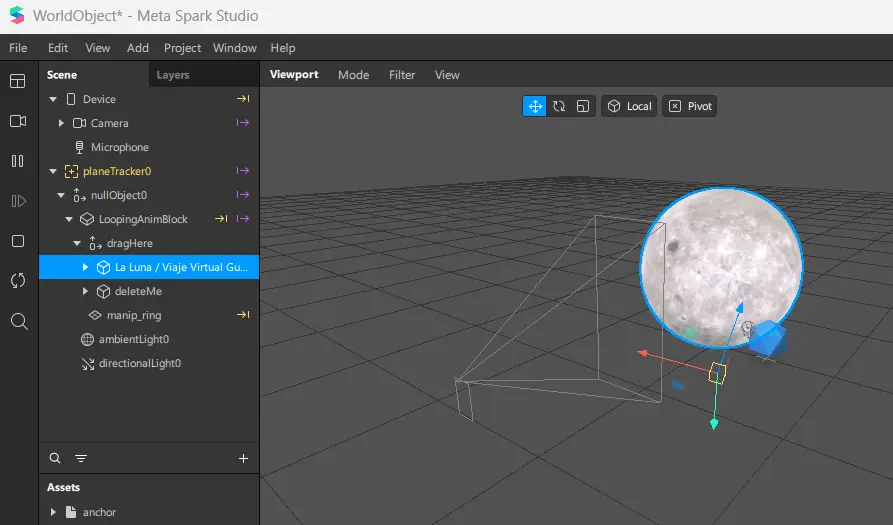
With our object in place, we can begin to change its color, there are various ways to manipulate it. You can:
- Change the directional light to give a 3D object more depth and realism.
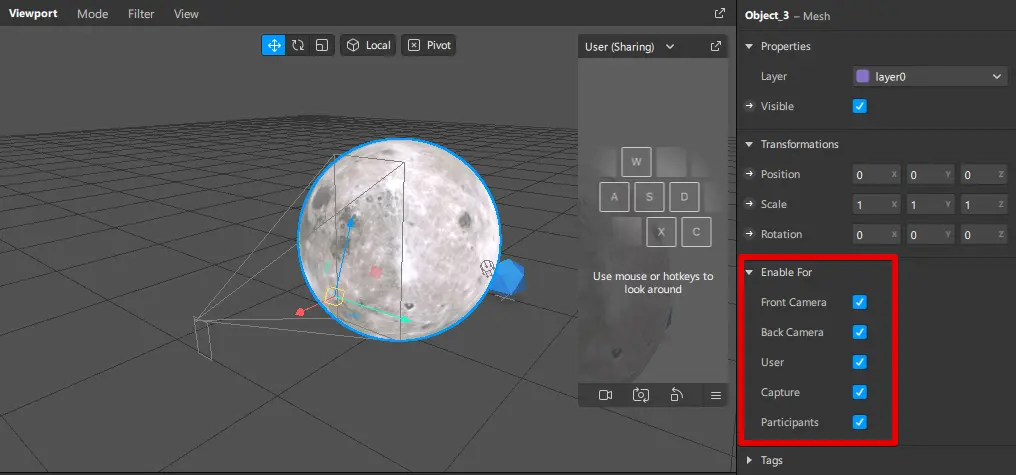
- Enable and disable appearance on front cameras, back cameras, or both.
- Alter the animation of your object.
- Add more effects, like additional animations, textures, and materials.
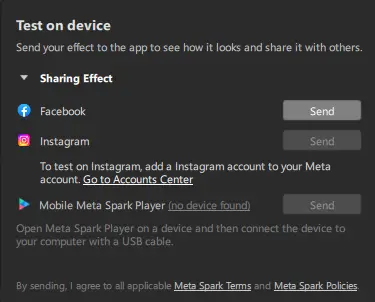
Step 5: Test Your New Effect
To test your new AR filter, you can send your test file to Instagram or Facebook. This will give you a preview of how your filter works on each platform.
Step 6: Publish Your Effect
When you’re ready to publish your AR filter, click on the “Upload” button in the bottom left-hand corner of the app.
AR filters are subject to review by Facebook. The process can take a few days. Ensure your filter meets Spark AR’s policies and guidelines. For more on creating filters that are approved without fail, read the submitting newly created effects for approval.
Wrapping This Up
Instagram AR Filters are a great way for brands to produce interactive content to stay top-of-mind with their audiences. As your filters can be applied to Facebook and Instagram, you have access to a large audience filled with users who love customizing posts and stories, meaning more reach for your brand.
An Instagram AR (Augmented Reality) filter is a computer-generated effect designed to be superimposed on real-life images. These filters work with your camera, adding layers or imagery in the foreground or background of your image, enhancing the visual experience. Meta Spark Studio is a desktop application provided by Meta (formerly Facebook) that allows users to create custom AR filters for Facebook and Instagram. It offers various features, including templates, patch editors, and APIs for developing effects using JavaScript. It simplifies the creation of interactive AR experiences with features like target tracking, depth mapping, and more. To create your own Instagram AR filter, follow these steps: Key features of Meta Spark Studio include: The approval process for AR filters can take a few days. Ensure that your filter meets Meta Spark's policies and guidelines to avoid delays. Submitting filters that adhere to these guidelines increases the chances of faster approval. While there are very limited direct monetization options for AR filters on Instagram, there are indeed ways to make money from Instagram AR filters. One way is to create these AR filters and sell them to brands using them for marketing. Another option is through brand collaborations, where brands would pay you to create user-generated content using your AR filters.Frequently Asked Questions
What is an Instagram AR Filter?
What is Meta Spark Studio?
How do I get started with creating my own Instagram AR filter?
What are the key features of Meta Spark Studio?
How long does it take for my AR filter to get approved by Facebook?
How can I monetize AR filters on Instagram?
SUGGESTED

Instagram Stories AR Filters: The What and How 2024 Guide
Create custom Instagram Stories AR filters to boost engagement and brand visibility...

The Ultimate 2024 Guide to Instagram Features for Marketers
Maximize your Instagram marketing in 2024 with this guide. Explore the features and...

Top 8 Virtual Reality (VR) & Augmented Reality (AR) Social Media Marketing Campaigns | Influencer Marketing Hub
Level up your Social Media Marketing campaigns with AR/VR. Drive engagement and create...